
วิธีตรวจปริทันต์ ทีละขั้นตอน
หกค่าที่วัด หกตำแหน่งบนฟันทุกซี่ และลำดับที่ตายตัวซึ่งช่วยไม่ให้คุณหลงที่ วิธีการเหมือนกันทั้งบนกระดาษและบนหน้าจอ
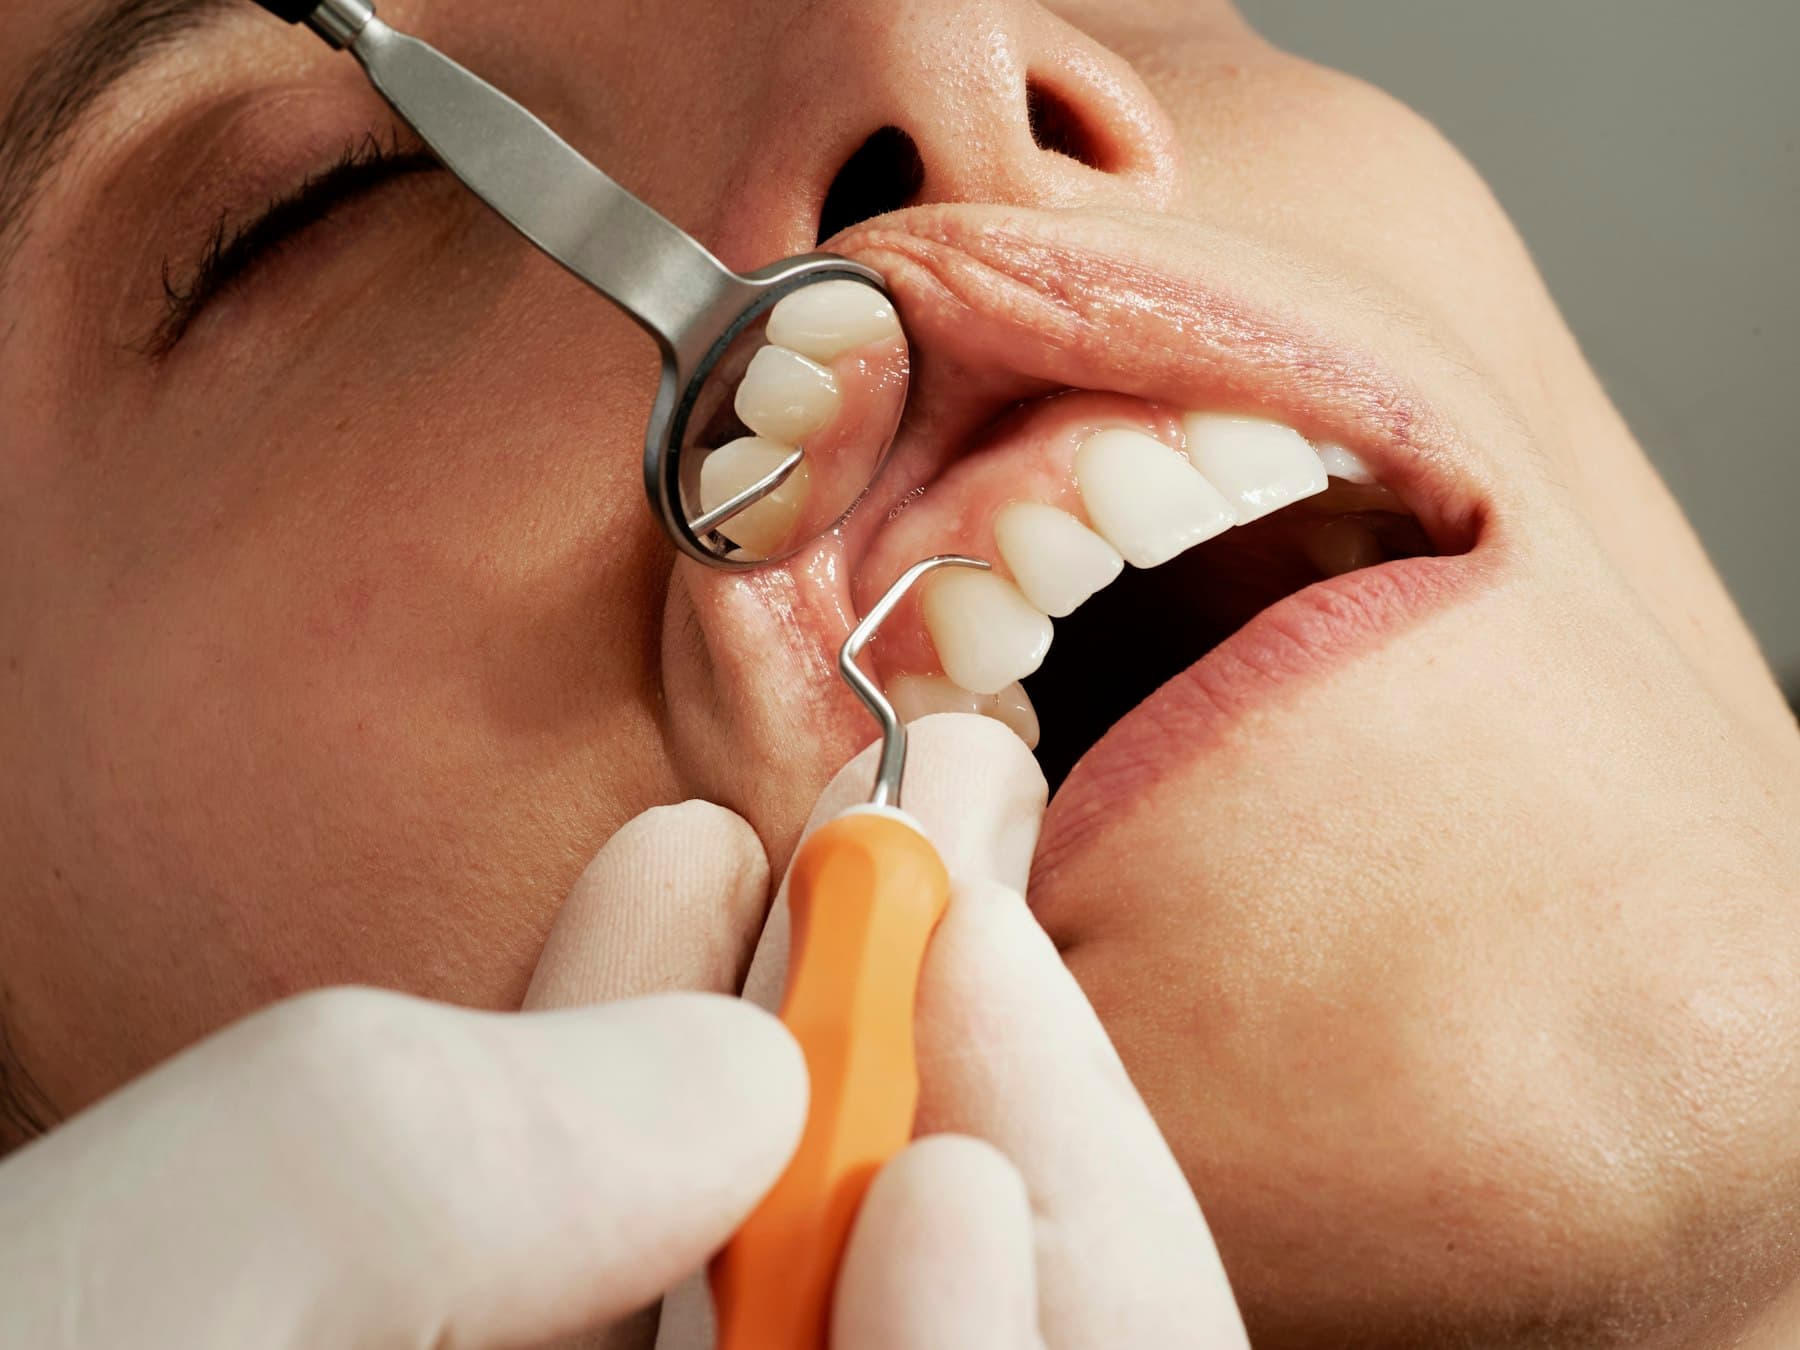
การตรวจปริทันต์คืออะไร
การตรวจปริทันต์คือบันทึกว่าฟันแต่ละซี่ยังเหลือการรองรับอยู่เท่าใด คุณวัดหกจุดเดิมรอบฟันทุกซี่ จดสิ่งที่พบ แล้วทำซ้ำในครั้งถัดไปเพื่อให้เปรียบเทียบสองครั้งได้ นี่เป็นวิธีเดียวที่จะแยกช่องปากที่คงที่ออกจากช่องปากที่กำลังสูญเสียการยึดเกาะ เพราะทั้งสองแบบอาจดูเหมือนกัน
หกตำแหน่ง ไม่ใช่ตัวเลขเดียว
สามจุดด้านแก้มและสามจุดด้านลิ้นของฟันแต่ละซี่ ฟันที่มีตำแหน่งลึกหนึ่งจุดและตื้นห้าจุด เป็นคนละปัญหากับฟันที่ลึกทั้งรอบ
ทั้งปากคือ 192 ตำแหน่ง
ฟัน 32 ซี่ ซี่ละหกตำแหน่ง จึงเป็นเหตุผลว่าลำดับสำคัญกว่าความเร็ว ถ้าข้ามไปหนึ่งตำแหน่ง ภายหลังคุณจะไม่รู้ว่าตำแหน่งนั้นปกติหรือถูกลืม
การเปรียบเทียบคือหัวใจ
แผนภูมิหนึ่งใบอธิบายวันนี้ สองใบที่เก็บด้วยวิธีเดียวกันบอกว่าการรักษาได้ผลหรือไม่ การตรวจที่เปลี่ยนวิธีระหว่างครั้ง เปรียบเทียบกันไม่ได้
หกสิ่งที่คุณบันทึก
แผนภูมิปริทันต์ทุกใบสร้างขึ้นจากสิ่งเหล่านี้ ตัวย่อเหมือนกันทั้งบนกระดาษและบนหน้าจอ และเป็นสากล แผนภูมิจึงส่งต่อระหว่างคลินิกได้
- ความลึกร่องลึกปริทันต์ (PD)
- จากขอบเหงือกลงไปถึงก้นร่อง หน่วยเป็นมิลลิเมตร 1 ถึง 3 ถือว่าปกติ ตั้งแต่ 4 ขึ้นไปคือจุดที่คุณเริ่มต้องใส่ใจ
- เหงือกร่น (REC)
- ขอบเหงือกอยู่ห่างจากรอยต่อเคลือบฟันกับซีเมนต์เท่าใด เป็นบวกเมื่อรากฟันโผล่ เป็นลบเมื่อเหงือกอยู่เหนือรอยต่อนั้น
- เลือดออกขณะตรวจ (BOP)
- ทำเครื่องหมายหรือไม่ทำ ทีละตำแหน่ง เป็นสัญญาณที่ดีที่สุดของการอักเสบที่ยังคุกรุ่น และเป็นตัวเลขที่ควรลดลงเป็นอันดับแรกหลังการรักษา
- คราบจุลินทรีย์ (PLQ)
- มีหรือไม่มี ทีละตำแหน่ง บันทึกแบบเดียวกับเลือดออก และอ่านคู่กัน เพราะคราบจุลินทรีย์อธิบายการมีเลือดออกที่คุณพบได้เกือบทั้งหมด
- การโยกของฟัน (MOB)
- ให้เกรดทีละซี่ ไม่ใช่ทีละตำแหน่ง ในระดับ 0 ถึง 3 สะท้อนว่ายังมีกระดูกยึดฟันเหลืออยู่เท่าใด มากกว่าจะบอกว่าร่องลึกแค่ไหน
- ง่ามรากฟัน (FURC)
- เฉพาะฟันหลายรากตรงที่รากแยกออกจากกัน ให้เกรดตามระยะที่เครื่องมือตรวจผ่านเข้าไประหว่างราก และมักเป็นสิ่งที่พบแล้วเปลี่ยนแผนการรักษา
วิธีบันทึกทั้งปาก บนกระดาษหรือบนหน้าจอ
นี่คือลำดับที่สถาบันส่วนใหญ่สอน และเป็นลำดับที่เครื่องมือนี้ใช้ ทำให้เหมือนเดิมทุกครั้ง แล้วแผนภูมิจะเทียบกับใบก่อนหน้าได้
- 01
จัดแบบฟอร์มให้พร้อมก่อน
กรอกชื่อผู้ป่วย วันที่ และผู้บันทึก ก่อนหยิบเครื่องมือตรวจ แบบฟอร์มที่เจอทีหลังโดยไม่มีวันที่ ไม่ได้บันทึกอะไรที่ใช้ได้เลย
- 02
เริ่มจากควอดรันต์เดียวและอย่าข้าม
บนขวาไปบนซ้าย แล้วล่างซ้ายไปล่างขวา คือเส้นทางที่ใช้กันทั่วไป เส้นทางไหนสำคัญน้อยกว่าการใช้เส้นทางเดิมเสมอ
- 03
เดินเครื่องมือตรวจ อย่าตรวจเป็นจุด
แนบเครื่องมือตรวจไว้กับรากฟันแล้วเดินรอบซี่ฟัน บันทึกค่าที่ลึกที่สุดในแต่ละสามโซนต่อด้าน รวมหกตัวเลขต่อฟันหนึ่งซี่
- 04
อ่านการร่นโดยเทียบกับรอยต่อเคลือบฟันกับซีเมนต์
หารอยต่อเคลือบฟันกับซีเมนต์ก่อน แล้ววัดไปถึงขอบเหงือก เขียนเป็นจำนวนลบเมื่อเหงือกอยู่เหนือรอยต่อแทนที่จะอยู่ใต้
- 05
ทำเครื่องหมายเลือดออก คราบจุลินทรีย์ และหนอง
รอสักครู่หลังตรวจแต่ละส่วนก่อนให้คะแนนเลือดออก ถ้าให้คะแนนเร็วเกินไปจะดูเหมือนไม่มี และเลือดออกคือสิ่งที่คุณไม่อยากพลาดที่สุด
- 06
ปิดท้ายด้วยการโยกของฟันและง่ามรากฟัน
ทั้งสองอย่างเป็นค่าต่อซี่ ไม่ใช่ต่อตำแหน่ง จึงทำรวดเดียวตอนท้ายได้เร็วกว่าแทรกไปกับการวัดหกตำแหน่ง
- 1B1828
- 2P1828
- 3B4838
- 4L4838
บันทึกบนกระดาษใช่ไหม มีแบบฟอร์มพิมพ์ฟรีที่ตีเส้นครบทั้งหกแถวแล้ว ทั้งขนาด A4 และ US Letter ไม่ต้องใช้อีเมลและไม่ต้องสมัครบัญชี
อ่านแผนภูมิที่กรอกแล้วออกเสียงดัง ๆ
ตัวเลขเปล่า ๆ สอนอะไรได้น้อยมาก นี่คือช่องปากที่บันทึกไว้พร้อมคำอธิบายสิ่งที่พบ และคุณเปิดแผนภูมิเดียวกันแล้วแก้อะไรก็ได้
- ร่องลึก 7 มม. ร่วมกับเหงือกร่น 2 มม.
- นั่นคือการยึดเกาะที่เสียไป 9 มม. ไม่ใช่ 7 การร่นถูกบวกเข้ากับความลึกร่องเพื่อให้ได้การสูญเสียการยึดเกาะทางคลินิก ซึ่งเป็นตัวเลขที่บอกความเสียหาย
- เลือดออกที่ตำแหน่งตื้น
- ตำแหน่งลึก 3 มม. ที่มีเลือดออกกำลังอักเสบอยู่วันนี้ ความลึกบอกสิ่งที่เกิดขึ้นไปแล้ว เลือดออกบอกสิ่งที่กำลังเกิดขึ้น จึงต้องอ่านคู่กัน
- รอยโรคง่ามรากฟันระดับ II ที่ฟันกรามล่าง
- เครื่องมือตรวจผ่านเข้าไประหว่างรากได้เกินหนึ่งในสาม โดยทั่วไปสิ่งนี้เปลี่ยนแผนการรักษาได้ด้วยตัวเอง ไม่ว่าความลึกร่องรอบ ๆ จะเป็นเท่าใด
จะเปิดในเครื่องมือฟรีพร้อมค่าที่วัดไว้แล้ว ไม่มีการบันทึกใด ๆ จึงเปลี่ยนอะไรก็ได้ตามต้องการ
ฝึกบนแผนภูมิเปล่าได้บ่อยเท่าที่ต้องการ
แผนภูมิฟรีไม่ต้องใช้บัญชีและไม่บันทึกอะไรเลย จึงเป็นที่ปลอดภัยสำหรับฝึกลำดับให้ติดมือ พิมพ์ค่าแล้วมันเลื่อนไปตำแหน่งถัดไปเอง ซึ่งเป็นสิ่งที่ทำให้คุณไม่หลงที่
พิมพ์ อย่าคลิก
ใส่ตัวเลขแล้วแผนภูมิจะเลื่อนไปเอง ปุ่มลูกศรใช้เลื่อนด้วยมือ Backspace ใช้ลบ และพิมพ์ 1 ตามด้วยอีกหลักหนึ่งจะได้ค่าตั้งแต่สิบขึ้นไป
เลือดออก คราบจุลินทรีย์ และหนอง
B, P และ S ทำเครื่องหมายในแถวของตัวเอง กดปุ่มเดิมซ้ำจะลบเครื่องหมายออก กดพลาดจึงไม่เสียหายอะไร
ใช้ระบบเลขฟันแบบใดก็ได้
สลับระหว่าง FDI กับระบบ Universal 1 ถึง 32 ได้เหนือแผนภูมิ ไฟล์ที่ส่งออกจะใช้ระบบที่แสดงอยู่
ใช้กับชั้นเรียน
การตรวจปริทันต์เรียนรู้ได้ด้วยการทำซ้ำ และอุปสรรคที่พบบ่อยคือซอฟต์แวร์ฝึกหัดต้องมีลิขสิทธิ์และการเข้าสู่ระบบก่อนใครจะเริ่มได้
- ไม่มีอะไรต้องแจก
- แผนภูมิเปิดในเบราว์เซอร์โดยไม่ต้องมีบัญชี ไม่ต้องติดตั้ง และไม่ต้องมีลิขสิทธิ์ นักศึกษาทั้งรุ่นเริ่มบันทึกได้ภายในหนึ่งนาทีหลังเปิดลิงก์
- ลิงก์เดียว แผนภูมิเดียวกัน
- ตัวอย่างที่กรอกแล้วส่งต่อในรูปลิงก์ ทุกคนที่เปิดจะได้สำเนาที่แก้ไขได้ของตัวเอง และการแก้ไขไม่ไปถึงคนอื่น
- กระดาษสำหรับโต๊ะฝึก
- แบบฟอร์มพิมพ์ฟรี ไม่มีลายน้ำ และไม่ต้องใช้อีเมล จึงถ่ายสำเนาแจกทั้งชั้นเรียนได้โดยไม่ต้องขออะไรจากใคร
คำศัพท์บนแผนภูมิ
- ความลึกร่องปริทันต์ (PPD)
- ระยะจากขอบเหงือกถึงก้นร่องเหงือกหรือร่องลึกปริทันต์ หน่วยเป็นมิลลิเมตร 1 ถึง 3 มิลลิเมตรโดยทั่วไปถือว่าปกติ
- การสูญเสียการยึดเกาะทางคลินิก (CAL)
- ความลึกร่องบวกกับการร่นของเหงือก วัดจากจุดอ้างอิงที่คงที่บนตัวฟันแทนที่จะวัดจากเหงือก จึงไม่ขยับตามเหงือก
- รอยต่อเคลือบฟันกับซีเมนต์ (CEJ)
- เส้นที่ตัวฟันเคลือบฟันมาบรรจบกับผิวรากฟัน เป็นจุดอ้างอิงคงที่ที่ใช้วัดการยึดเกาะทุกครั้ง
- เหงือกร่น
- ขอบเหงือกเคลื่อนห่างจากรอยต่อเคลือบฟันกับซีเมนต์ไปมากเพียงใดจนเผยผิวราก บันทึกเป็นจำนวนลบเมื่อเหงือกอยู่เหนือรอยต่อแทน
- เลือดออกขณะตรวจ (BOP)
- ตำแหน่งนั้นมีเลือดออกหลังการตรวจอย่างเบามือหรือไม่ บันทึกทีละตำแหน่งว่ามีหรือไม่มี และเป็นสัญญาณแรกสุดว่าการอักเสบยังคุกรุ่น
- หนอง
- หนองที่ถูกรีดออกจากร่องลึกปริทันต์ บันทึกทีละตำแหน่ง พบไม่บ่อย และเป็นสัญญาณของการติดเชื้อที่ยังคุกรุ่นซึ่งสำคัญกว่าค่าความลึกร่องระดับปานกลาง
- รอยโรคบริเวณง่ามรากฟัน
- การสูญเสียกระดูกระหว่างรากของฟันหลายราก ให้เกรดตามระยะที่เครื่องมือตรวจผ่านเข้าไปในช่องว่างระหว่างราก
- การโยกของฟัน
- ฟันขยับได้มากเพียงใดเมื่อออกแรงกด ให้เกรด 0 ถึง 3 ต่อซี่ สะท้อนกระดูกรองรับที่เหลืออยู่มากกว่าความลึกของร่อง
คำถามที่พบบ่อย
- การตรวจปริทันต์คืออะไร
- เป็นบันทึกว่าฟันแต่ละซี่ยังเหลือการรองรับอยู่เท่าใด คุณวัดหกจุดรอบฟันทุกซี่ จดเลือดออก คราบจุลินทรีย์ การโยก และง่ามรากฟัน แล้วทำซ้ำในครั้งถัดไปเพื่อเปรียบเทียบผลได้ แผนภูมิใบเดียวอธิบายวันนี้ สองใบแสดงว่ามีอะไรเปลี่ยนไปหรือไม่
- ตรวจปริทันต์บนกระดาษทำอย่างไร
- กรอกชื่อผู้ป่วยและวันที่ก่อน แล้วทำทีละควอดรันต์ในลำดับเดิมทุกครั้ง เดินเครื่องมือตรวจรอบฟันแต่ละซี่และบันทึกค่าที่ลึกที่สุดในแต่ละสามโซนต่อด้าน จากนั้นบันทึกการร่นเทียบรอยต่อเคลือบฟันกับซีเมนต์ ต่อด้วยเลือดออกและคราบจุลินทรีย์ แล้วปิดท้ายด้วยการโยกและง่ามรากฟันทีละซี่ เว็บไซต์นี้มีแบบฟอร์มพิมพ์ฟรีที่ตีเส้นครบทั้งหกแถวแล้ว
- ตัวเลขบนแผนภูมิปริทันต์หมายถึงอะไร
- แถวหลักคือความลึกร่องเป็นมิลลิเมตร 1 ถึง 3 โดยทั่วไปถือว่าปกติ และ 4 ขึ้นไปควรใส่ใจ แถวถัดมาคือการร่นวัดจากรอยต่อเคลือบฟันกับซีเมนต์ เมื่อบวกสองค่าเข้าด้วยกันจะได้การสูญเสียการยึดเกาะทางคลินิก ซึ่งเป็นตัวเลขที่บอกว่าการรองรับหายไปจริงเท่าใด
- ตรวจทั้งปากใช้เวลานานแค่ไหน
- ทั้งปากคือ 192 ตำแหน่ง ครั้งแรก ๆ จึงช้าเป็นธรรมดา เมื่อลำดับเข้าที่และมีคนช่วยจดอีกคน มักลงตัวราวห้าถึงสิบนาที การบันทึกบนหน้าจอตัดงานจดออกไปครึ่งหนึ่ง เพราะทุกค่าที่พิมพ์จะเลื่อนเคอร์เซอร์ไปตำแหน่งถัดไปเอง
- ฝึกตรวจปริทันต์ได้ที่ไหน
- ที่แผนภูมิฟรีบนเว็บไซต์นี้ ไม่ต้องใช้บัญชี ไม่บันทึกอะไร และโหลดใหม่ได้บ่อยเท่าที่ต้องการ จึงไม่มีอะไรให้เสียหาย หน้านี้ยังมีตัวอย่างที่กรอกแล้วซึ่งคุณเปิดและแก้ไขได้ และมีแบบฟอร์มเปล่าให้พิมพ์หากอยากฝึกบนกระดาษ
- ต้องมีบัญชีไหม
- ไม่ต้อง ทั้งการบันทึก การอ่านสรุป และการส่งออก PDF ทั้งหมดฟรีและไม่ระบุตัวตน และไม่มีการจัดเก็บใด ๆ บัญชีฟรีเพิ่มการบันทึกผู้ป่วยและการเปรียบเทียบแผนภูมิของผู้ป่วยข้ามครั้งที่มา ซึ่งเครื่องมือแบบไม่ระบุตัวตนทำไม่ได้เพราะไม่เก็บอะไรไว้เลย
- ความลึกร่องปริทันต์ปกติเท่าไร
- 1 ถึง 3 มิลลิเมตรโดยไม่มีเลือดออกขณะตรวจ ถือว่าปกติโดยทั่วไป 4 ถึง 5 มิลลิเมตรบ่งชี้ร่องที่ต้องรักษา และ 6 ขึ้นไปมักเรียกว่าลึก อย่างไรก็ตามความลึกอย่างเดียวไม่ใช่ภาพทั้งหมด ตำแหน่งตื้นที่มีเลือดออกก็ยังอักเสบอยู่
- เหมาะกับนักศึกษาทันตสาธารณสุขไหม
- เหมาะ และเป็นการใช้งานที่พบบ่อย ไม่มีลิขสิทธิ์ ไม่ต้องติดตั้ง และไม่ต้องมีบัญชี ทั้งชั้นเรียนจึงเปิดตัวอย่างเดียวกันและแก้ไขสำเนาของตัวเองได้ แบบฟอร์มพิมพ์ไม่มีลายน้ำและถ่ายสำเนาเพื่อฝึกบนโต๊ะได้อย่างอิสระ

บันทึกทั้งปากได้ภายในห้านาทีนี้
ไม่ต้องสมัครบัญชี ไม่ต้องติดตั้ง และไม่มีการบันทึกไว้ที่ใดนอกจากที่คุณวางไว้เอง
เปิดแผนภูมิฟรี